Tomcat Installation and Basic Setup

When we learn DevOps, we usually see tools like Maven, SonarQube, Nexus and Jenkins.
A simple flow is:
Developer → Git → Maven → SonarQube → Nexus → Tomcat
Later, we use Jenkins to automate this complete process.
Before automation, I want to understand how Tomcat works manually. So in this blog, let's install Tomcat and understand its basic directory structure, users, deployment and port configuration.
What is Tomcat?
Apache Tomcat is a Java application server used to deploy and run Java web applications (.war files).
In many organizations, developers build applications and deploy them to Tomcat servers.
Today, let's install and understand Tomcat.
1. Install Java
Tomcat requires Java to run because Tomcat is developed using Java.
sudo dnf search java

sudo dnf install java-21-amazon-corretto-devel -y

java -version
javac -version
If Java is installed correctly, we can see the Java version.
2. Install required tools
I need wget to download Tomcat, unzip to extract it and tree to see the directory structure.
sudo dnf install wget unzip tree -y
3. Download and install Tomcat
For the Tomcat installation, always get the download link from the official Apache Tomcat documentation. Older Tomcat versions may not be compatible with newer Java versions.
You can find the latest Tomcat 9 downloads here:
Tip: Choose the required version from the official page instead of using an old download link from a tutorial.
Go to /opt and download Tomcat.
sudo su -

cd /opt

wget https://dlcdn.apache.org/tomcat/tomcat-9/v9.0.122/bin/apache-tomcat-9.0.122.zip

unzip apache-tomcat-9.0.122.zip

cd apache-tomcat-9.0.122/bin
Give execute permission to the shell scripts:
chmod u+x *.sh
4. Start Tomcat
Start Tomcat using:
sh catalina.sh start
Check whether Tomcat is running:
ps -ef | grep tomcat
Check the Tomcat logs:
tail -f /opt/apache-tomcat-9.0.122/logs/catalina.out
Check port 8080:
ss -lntp | grep 8080
If Tomcat is running, port 8080 should be listening.
5. Tomcat directory structure
The tree command helps us understand the Tomcat folders.
cd /opt/apache-tomcat-9.0.122

tree -L 2
The important directories are:
apache-tomcat-9.0.122/
│
├── bin/
├── conf/
├── lib/
├── logs/
├── temp/
├── webapps/
└── work/
What are these folders?
bin/
Contains scripts used to start and stop Tomcat.
startup.sh
shutdown.sh
catalina.sh
catalina.sh is the main script used to control Tomcat.
conf/
Contains Tomcat configuration files.
server.xml
tomcat-users.xml
server.xml → server and port configuration.
tomcat-users.xml → users and roles.
lib/
Contains Tomcat .jar files.
logs/
Contains Tomcat log files.
webapps/
This is where web applications are deployed.
For example:
ROOT
manager
host-manager
temp/
Used for temporary files.
work/
Contains files generated while Tomcat processes applications.
6. Access Tomcat
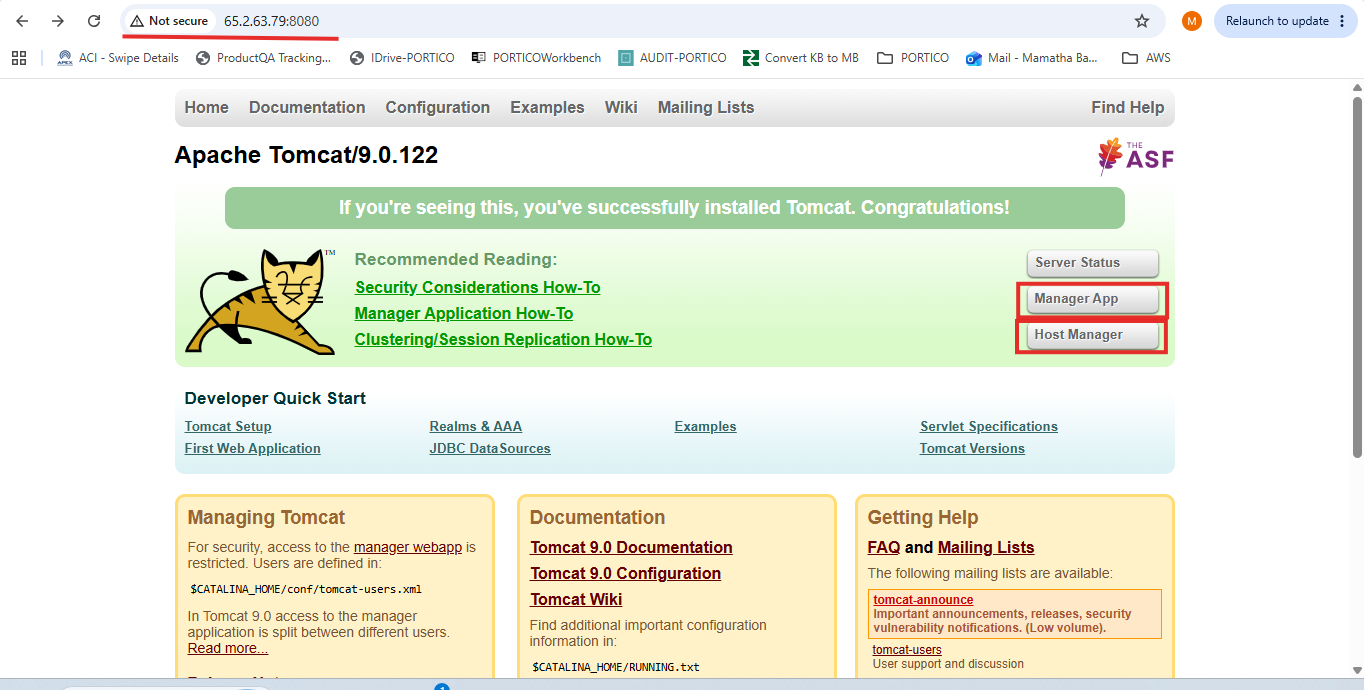
Open the browser:
http://<EC2-PUBLIC-IP>:8080
You should see the Tomcat page.
Note: Enable port 8080 in the Security Group inbound rules.
7. Tomcat Manager App
Tomcat provides a Manager App to manage applications.
Click:
Manager App
Initially, it may ask for username and password.
To enable access, go to:
cd /opt/apache-tomcat-9.0.122/webapps/manager/META-INF

vi context.xml
In context.xml, comment the relevant RemoteAddrValve lines.
:se nu => comment 21st and 22nd lines.
<!--
...(21st and 22nd line)
-->
Screenshot: context.xml before/after commenting
8. Create Tomcat user
Now go to:
cd /opt/apache-tomcat-9.0.122/conf

vi tomcat-users.xml
Add a user and required roles before the closing tomcat-users tag.
Example:
<user username="mamatha" password="password" roles="manager-gui,admin-gui"/>
<user username="tomcat" password="password" roles="manager-gui,admin-gui"/>
Save the file.
Now open the Manager App again and enter the username and password.
For a real production server, use a strong password and follow your organization's access/security rules. Don't use simple demo credentials.
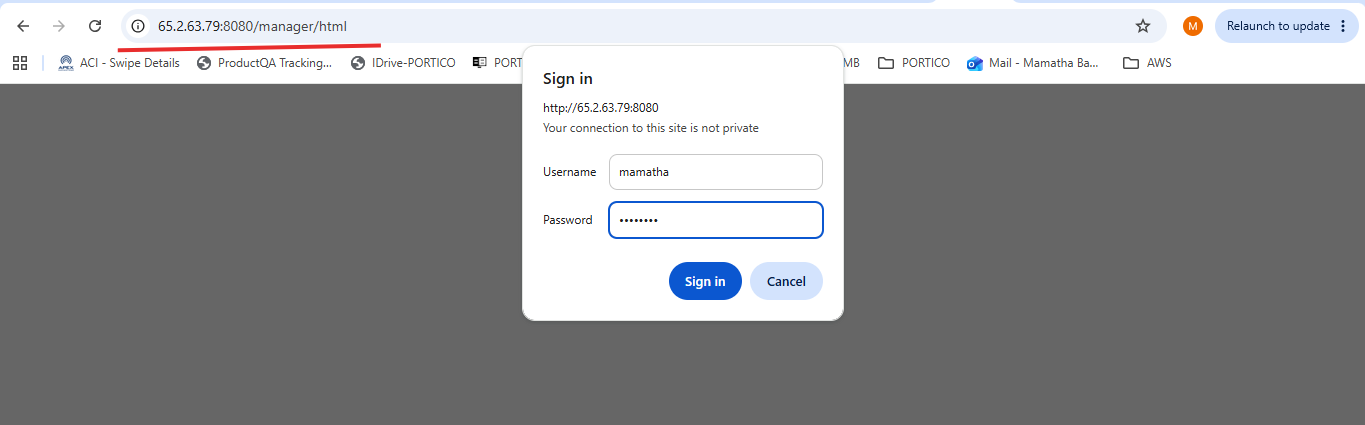
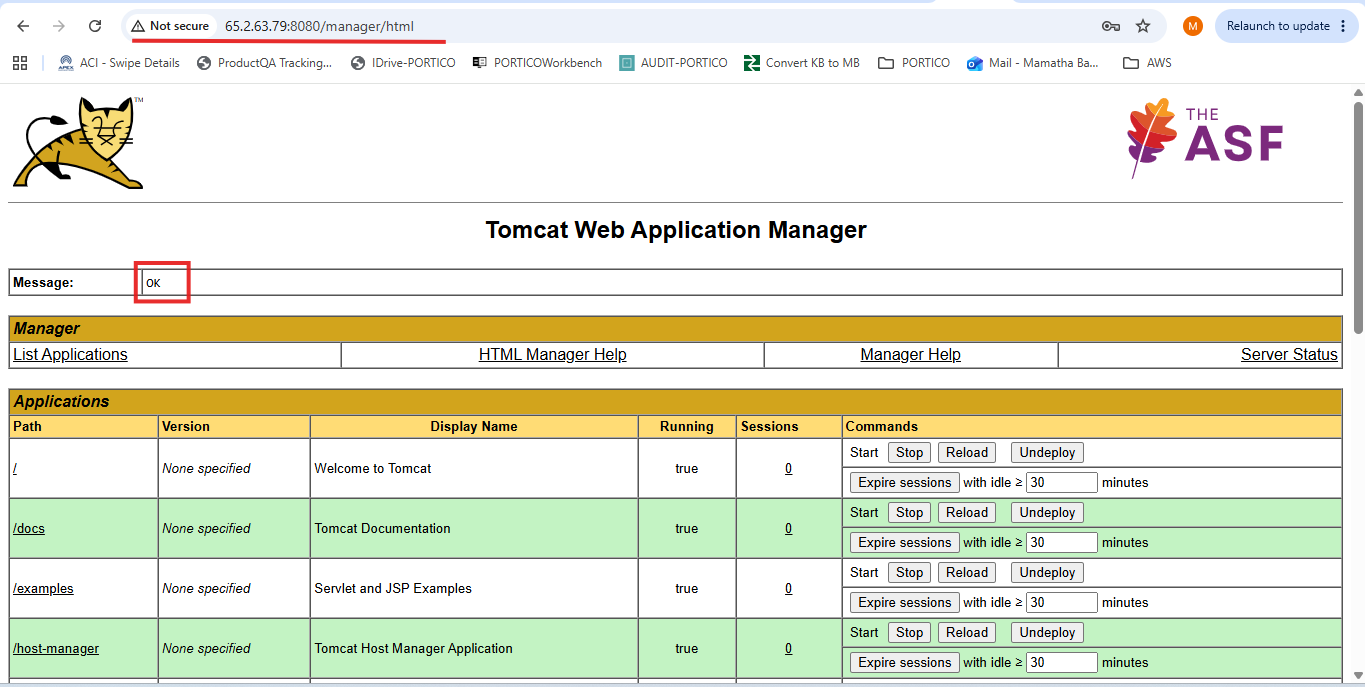
Manager App after successful login
Tomcat UI shows the message ok
9. Host Manager
We can configure the Host Manager in a similar way.
Go to:
cd /opt/apache-tomcat-9.0.122/webapps/host-manager/META-INF

ls
You will see:
context.xml
Edit it:
vi context.xml
Comment the relevant access restriction lines.
Then open:
Host Manager
and provide the Tomcat credentials.
10. Check Tomcat logs
Tomcat creates log files under:
cd /opt/apache-tomcat-9.0.122/logs

ls
Some important files are:
catalina.out
localhost_access_log...
When troubleshooting Tomcat, logs are one of the first places to check.
When troubleshooting Tomcat, logs are one of the first places I check.
Deploy a WAR file
One common way to deploy a Java web application is using a .war file.
We can copy the WAR file into:
/opt/apache-tomcat-9.0.122/webapps/
For example:
cp myapp.war /opt/apache-tomcat-9.0.122/webapps/
Tomcat detects the WAR file and deploys the application.
We can also deploy a WAR using the Manager App.
Go to:
Manager App → Deploy → WAR file to deploy → Choose File → Deploy
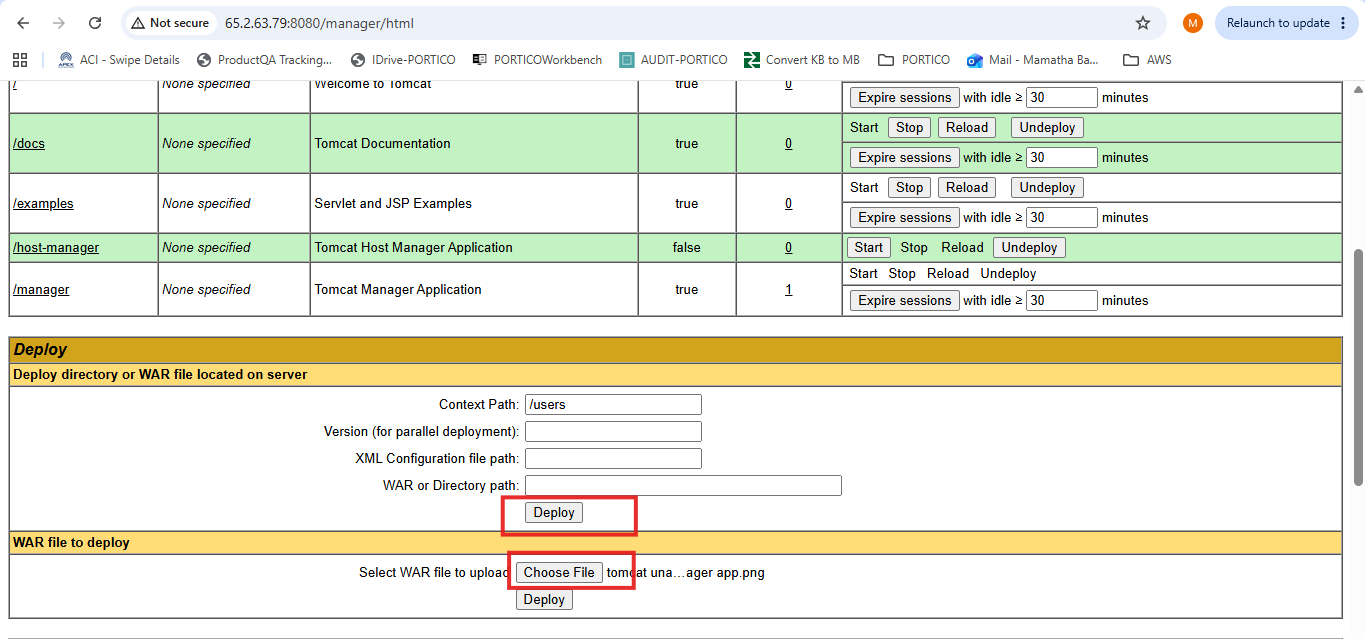
This is useful for understanding manual deployment.
Later, instead of manually uploading the WAR file, Jenkins can do this automatically.
What if Tomcat and Jenkins use the same port?
This is an important situation.
Suppose:
Tomcat → 8080
Jenkins → 8080
Both applications cannot listen on the same port on the same server.
We will get a port conflict such as:
java.net.BindException
So we need to change one of the ports.
For example:
Tomcat → 8081
Jenkins → 8080
Change Tomcat port
Go to:
cd /opt/apache-tomcat-9.0.122/conf
Open:
vi server.xml
Find the connector port:
<Connector port="8080" ... />
Change it to:
<Connector port="8081" ... />
Stop Tomcat and start it again:
cd /opt/apache-tomcat-9.0.122/bin

sh catalina.sh stop

sh catalina.sh start
Now access:
http://<EC2-PUBLIC-IP>:8081
Important: If this is an AWS EC2 instance, make sure the new port is allowed in the Security Group.
Conclusion:
In this blog we installed Apache Tomcat and understood how it works. This blog covers:
Installing Java and Tomcat
Understanding the important Tomcat directories
Starting and stopping Tomcat
Accessing the Manager App and Host Manager
Creating users and roles
Deploying a WAR file
Checking Tomcat logs
Changing the Tomcat port
Understanding basic port conflicts.
This gives us a basic understanding of Tomcat before moving to the next tools in the DevOps process.
In the next blog, we will set up Maven and understand how it is used to build a Java application.
Then we will continue with SonarQube, Nexus and Jenkins and finally connect them together for automation.